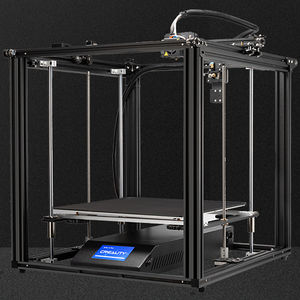
3D Printers/Ender 5 plus: Difference between revisions
| Line 65: | Line 65: | ||
* using the built in e-steps I got 137.85 steps/mm (this is in the firmware, in the slicer you just change the flow rate) | * using the built in e-steps I got 137.85 steps/mm (this is in the firmware, in the slicer you just change the flow rate) | ||
* at 220C and using PLA, got a max volumetric flow rate of 17 mm^3/s | |||
* at 250C and using PETG, got a max volumetric flow rate of 19 mm^3/s | |||
== Printable Upgrades == | == Printable Upgrades == | ||
Revision as of 04:26, 6 December 2023

Status
Last Known Good Settings
| Date | Filament type, colour, brand | First layer | Other layers | Notes |
|---|---|---|---|---|
| Nov 1, 2023 | PETG, translucent green, polymaker | noz: 250, bed 90 | noz: 250: bed 80 |
Usage and Slicer
- there is no octoprint or other network connection set up yet. There is usb port on the side of the touchscreen and there should be a usb stick in it, use that
- use this config file for prusaslicer, it includes a filament profile for PETG and general print settings
Media:PrusaSlicer_E5P_config_bundle_physical_printer.zip
- to import into prusa slicer: File -> Import -> Import Config Bundle
- to get the physical printer profile make sure to do the bundle on not just "import config"!!!
- to import into prusa slicer: File -> Import -> Import Config Bundle
- on the left panel of prusa slicer, at the top of that panel there should be 3 drop down menus: "Print settings", "Filament" and "Printer". In those menu's select the profiles for the Ender 5 Plus
- BE SURE that in the printer profile is set to the ender 5 plus, or else their will be wrong PHYSICAL (REAL LIFE) machine movement limits and the gcode that is generated will move the printer all weird and could damage the printer!!
- on the left panel of prusa slicer, at the top of that panel there should be 3 drop down menus: "Print settings", "Filament" and "Printer". In those menu's select the profiles for the Ender 5 Plus
- adjust the print settings (add support, or a brim or more perimeters, etc) if desired
- slice it and export the gcode to the usb stick, then plug that into the side of the screen
- to load the filament push it all the way through the tubing to the direct drive extruder, then can use the knob on the extruder to load it down to the nozzle. If you have trouble inserting it into the long tube, try to rotate the filament while pushing, if all else fail then push down on the blue collar around the fitting to remove the tubing from it and can push the filament through
- always check the first layer!!! there is live z-adjust on the touchscreen called "baby steps"
Hardware
- 1mm CHT nozzle installed (high flow)
- screen is Big Tree Tech TFT35-E3 V3.0
- mainboard is Big Tree Tech SKR Mini E3 V2.0
- power supply is Mean Well RSP-500-24 (the good one, not first release of this printer that had a shitty one)
- Printhead is Micro Swiss Direct Drive and All-Metal Hot end
- Probe is official BL-Touch (which is stock on the E5P)
- it should be set and forget, don't think it needs to be recalibrated ever unless some hardware thing changes
- can use 'babystep' feature to live z-adjust during printing
- refer to this for setting the probe offset https://www.youtube.com/watch?v=y_1Kg45APko
Direct control of printer
To use pronterface to control the printer, first power up the printer, then connect the usb cable to your computer. On win10 it should auto-detect and possibly install 'maple' (wtf that is lol). Baud 115200
Calibration notes
- using the built in e-steps I got 137.85 steps/mm (this is in the firmware, in the slicer you just change the flow rate)
- at 220C and using PLA, got a max volumetric flow rate of 17 mm^3/s
- at 250C and using PETG, got a max volumetric flow rate of 19 mm^3/s
Printable Upgrades
https://www.thingiverse.com/thing:4742487 https://www.thingiverse.com/thing:4742501
Voron cooling fans: https://www.thingiverse.com/thing:5171295
Z-axis sync indicators: https://www.thingiverse.com/thing:4460521
Print bed usage
The glass plate has a magnetic underside which as been heat fused to the aluminum bed lol. So it is more or less permanently stuck on there. Use the spring steel PEI plate, secure it to the black clips.
Wait for the PEI sheet to cool before removing your prints, take it off the bed and it will cool faster. PETG can rip off the PEI coating if it too hot.
SD Card
Slicer Settings
Use the config bundle for prusa slicer, a copy is in this wiki under 'usage' and another copy is on the USB drive.
Keep in mind that this printer has a 1mm nozzle installed. The slicer settings I uploaded set the line width to 1.2mm and layer height to 0.6mm. So for an object with 1 perimeter is the equivalent of 3 perimeters with a 0.4 nozzle (so decently strong). So for most objects 1 perimeter and 3 top/bottom layers is plenty of plastic and will be strong enough. This will save a shitload of time!!
A few random printing tips
just pray to the right god lol
Octoprint at octopi4.hacklab.to
I wish...
Maintenance Resources
put stuff here lol
Maintenance Log
Most recent entries at the top.
| Date | Notes | Entry By |
|---|---|---|
| June 9, 2022 | Setting up the printer | Rana |
| Nov 1, 2023 | 1mm nozzle installed and it works!!! | Rana |