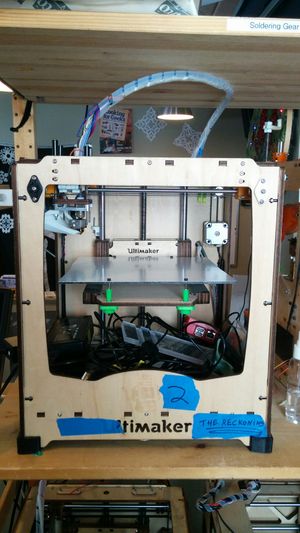
Ultimaker 2
This page documents Ultimaker #2 (Fawkes) [A phoenix from the ashes]

Status
- The Ultimaker is in working order.
- Uses 3mm PLA filament.
- It is managed and accessible from the web GUI: http://octopi2.hacklab.to/
Machine Log
| Date | Notes | Entry By |
|---|---|---|
| September 26, 2015 | Removed overly-brittle, broken PLA from the feeding tube. Machine back in working order with new PLA. PLA can become stale and brittle due to moisture absorption. | Justin |
| July 28, 2013 | Found new Arduino mega and installed marlin firmware via CURA. Checked all axis movements, checked thermocouple via external temperature sensors and finalized hot-end. Installed build platform. Removed raspberry pi. | Norm |
| July 27, 2013 | Cemented thermocouple into tube, fit tube into hot end. Attempted firmware uploads using Cura (failed) and Xloader (succeeded) | Norm |
| June 23, 2013 | Machined remaining parts and assembled feeder, mounted and tested (dry run without power, tensioner only). Attached flying lead ends of thermocouple onto thermocouple amp. |
Norm |
| June 22, 2013 | Printed out and assembled most of the feeder, lubricated gantry. | Norm |
| June 18, 2013 | Printed out parts for feeder | Norm |
| June 10, 2013 | Stripped apart old filament feeder and began building new feeder which uses the hobbed pulley. Parts on order, machined other parts. | Norm |
| June 8, 2013 | Rebuilt hot-end, rebuilt gantry components, mounted entire gantry, roughly aligned belts, verified general mechanical functions! Finished mounts for build platform (cutting build platform and mounting to be completed). |
Norm |
| May 29, 2013 | Boden tube, V2 hot end components, and belts arrived. | Norm |
| May 16, 2013 | Ordered Boden tube and V2 hot end components (the feeder upgrade can be printed for cheap). Belts ordered for Ultimaker 1 (when they are needed for replacement). (~$138) | Norm |
| May 15, 2013 | Printed Z home switch adjustment block and holder. Designed and printed parts for new build platform system. |
Norm |
| April 29, 2013 | Printed fourth X/Y bushing block and Raspberry Pi bracket | Norm |
| April 27, 2013 | Assembled 3/4 X/Y bushing blocks, 4th print failed mid-print. | Norm |
| April 24, 2013 | Unmounted dual extruder.
Stripped out X/Y gantry parts for rebuild (X/Y blocks broken). |
Norm |
| April 22, 2013 | Reorganized shelf to accommodate the Ultimaker, organized materials and supplies. | Norm |
To Do List
- Repairs
- Finish to-do list/upgrade list
- Reprint X/Y bushing blocks, remount
- Print tensioners, install
- Print new extruder in entirety, mount
- Print Raspberry Pi mounting plate, mount pi, wire up
- Straighten Z axis acme rod
- Crimp cable going to print head
- Remount X/Y gantry system
- Order hot end
- Order boden cable
- Order extruder (dependent on success of printable extruder)
- Flash firmware
- Calibrate endstops
- Printable Upgrades
- Spool holder
- Magnetically attached print bed
- Motor mounts
- Fan cowling
- Z axis home switch adjuster
- Axis end-caps