3D Printers: Difference between revisions
Jump to navigation
Jump to search
(Section Re-org.) |
|||
| Line 1: | Line 1: | ||
= Quick Start Instructions = | |||
== PrusaSlicer == | |||
Hacklab Toronto has consensus around using PrusaSlicer for new users. | |||
[[https://www.prusa3d.com/prusaslicer/ Download and Install PrusaSlicer]] | |||
== Your First Print == | |||
=== Prusa Mini === | |||
Hacklab's main printers are the Prusa Mini. | |||
* [[https://www.prusa3d.com/new-user-guides-for-original-prusa-mini/ Prusa New User Guides]] | |||
==== Prusa Mini ==== | |||
# Generate Gcode from an STL using PrusaSlicer | |||
# Copy your Gcode to the USB key attached to the printer. | |||
# Click Print | |||
# When finished, allow the bed to cool, and then wipe clean with small amount of isopropyl alcohol on clean paper towel. | |||
== DO NOT LEAVE MACHINES UNATTENDED == | == DO NOT LEAVE MACHINES UNATTENDED == | ||
''' Please do | ''' Please do run 3d printers with being present in the Lab.''' | ||
If a printer fails it could result in cooked filament / extruders, damaged mechanical components, or fires. | |||
= Explore Further = | |||
== Firmware and Configuration == | |||
* Wiki doesn't like weird file types so check out our [https://github.com/hacklabto/3d-printers Github] | |||
== | == Machines at Hacklab == | ||
<!-- Update the status on the printer page, it will get included here! --> | <!-- Update the status on the printer page, it will get included here! --> | ||
{| class="wikitable" | {| class="wikitable" | ||
| Line 42: | Line 68: | ||
|| <!--Additional notes--> | || <!--Additional notes--> | ||
|} | |} | ||
See individual printer pages for details and maintenance logs. | See individual printer pages for details and maintenance logs. | ||
=== Physical Problems === | === Physical Problems === | ||
* Print not sticking to bed | * Print not sticking to bed | ||
| Line 109: | Line 84: | ||
** Check filament feeder for ground plastic preventing full continuous extrusion | ** Check filament feeder for ground plastic preventing full continuous extrusion | ||
== See Also == | == See Also == | ||
* [[Construct Protocol]] | * [[Construct Protocol]] | ||
[[category: Equipment]] | [[category: Equipment]] | ||
Revision as of 00:18, 20 February 2024
Quick Start Instructions
PrusaSlicer
Hacklab Toronto has consensus around using PrusaSlicer for new users. [Download and Install PrusaSlicer]
Your First Print
Prusa Mini
Hacklab's main printers are the Prusa Mini.
Prusa Mini
- Generate Gcode from an STL using PrusaSlicer
- Copy your Gcode to the USB key attached to the printer.
- Click Print
- When finished, allow the bed to cool, and then wipe clean with small amount of isopropyl alcohol on clean paper towel.
DO NOT LEAVE MACHINES UNATTENDED
Please do run 3d printers with being present in the Lab. If a printer fails it could result in cooked filament / extruders, damaged mechanical components, or fires.
Explore Further
Firmware and Configuration
- Wiki doesn't like weird file types so check out our Github
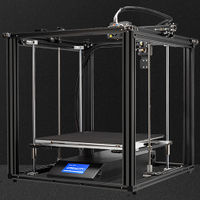
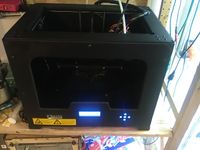
Machines at Hacklab
See individual printer pages for details and maintenance logs.
Physical Problems
- Print not sticking to bed
- Check bed levelness (Prusa's probe this automatically)
- Check print bed distance to print head (Live Z height adjust)
- Extruder no longer extruding filament
- Check filament feeder for ground plastic preventing extrusion
- Check gcode generator settings to ensure proper filament properties selected (diameter, density)
- Inspect hot-end for plugs by manual extrusion at temperature
- Check filament feeder spring pressure (WARNING: DO NOT ADJUST THIS UNLESS YOU KNOW WHAT YOU ARE DOING, THIS IS THE LAST STEP)
- Extrusion is discontinuous
- Check filament feeder for ground plastic preventing full continuous extrusion

