3D Printers: Difference between revisions
| Line 17: | Line 17: | ||
These instructions will take you from an STL file to a printed object. | These instructions will take you from an STL file to a printed object. | ||
An STL describes the idealized 3D object you want to produce. | An STL describes the idealized 3D object you want to produce. | ||
We won't cover producing the STL file. For the purpose of following this tutorial you can use this STL file, which describes a small storage bin. | We won't cover producing the STL file. For the purpose of following this tutorial you can use [[:File:Gridfinity_box.zip|this STL file]], which describes a small storage bin. | ||
==== Installing and setting up PrusaSlicer ==== | ==== Installing and setting up PrusaSlicer ==== | ||
Revision as of 02:22, 21 February 2024
Quick Start Instructions
These instructions are currently in the process of being re-written and updated.
PrusaSlicer
Hacklab Toronto has consensus around using PrusaSlicer for new users. [Download and Install PrusaSlicer]
Your First Print
If you are new to 3D printing we ask that you use HackLab's Pusa Mini printers for your first prints, with PrusaSlicer as the slicer. These are our most reliable printers, and simplest to use.
The Toolchain
These instructions will take you from an STL file to a printed object. An STL describes the idealized 3D object you want to produce. We won't cover producing the STL file. For the purpose of following this tutorial you can use this STL file, which describes a small storage bin.
Installing and setting up PrusaSlicer
You will need to install it to be able to convert your STL into G-code. PrusaSlicer runs on your computer, not on the printer itself. Download it from [1] and install it.
After installation you will be presented with several setup pages. To set up PrusaSlicer to work with the HackLab PrusaMinis (and avoid the risk of selecting the wrong printer type be accident) do the following:
- Under the "Prusa FFF" page: Scroll down to "MINI Family" and select "0.4mm nozzle" under "Original Prusa MINI & MINI+ Input Shaper". Make sure all other printers are not selected.
- Skip through the "Prusa MSLA", "Other Vendors" and "Custom Printer" pages.
- Under "Filaments" page: make sure Generic ABS, PLA and PETG are selected. Make sure other filaments are de-selected.
- Skip though "Updates", "Downloads", "Reload from disc".
- Under the "View mode" page select "Expert mode".
You should now be presented with PrusaSlicer showing a blank build plate.
Slicing with PrusaSlicer
You should have PrusaSlicer open showing a blank build plate: FIXME: Insert screenshot here
Import you STL (note: do _not_ "open" a project with Ctrl-O, you are "importing" an STL with Ctrl-I). The build plate should show the object you just imported - check that it looks like the thing you intend to print! FIXME: Insert screenshot here
For your first print, you will be printing using PLA. Go to the "Filament Settings" tab and select "Generic PLA @MINIIS" from the dropdown menu. FIXME: Insert screenshot here This step is very important. If you do not have the correct filament type selected, the printer will use the wrong temperature and may not melt the filament.
Return to the "Plater" tab and select "Slice Now". Your display will change to show the object that will be printed, rather than the idealised 3D model that you have imported. The bar at the right hand side can be dragged up and down to change which layers are shown. This can be useful to visualise how the interior of your model will be infilled. Look at the lower right where there is a "Sliced info" panel and a field "Cost". In my example it reads "0.25", so this is costing 25c of filament.
Below here is still being rewritten
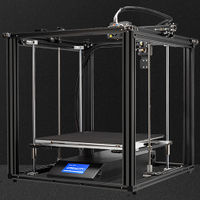
Prusa Mini
Hacklab's main printers are the Prusa Mini.
Prusa Mini
- Generate Gcode from an STL using PrusaSlicer
- Copy your Gcode to the USB key attached to the printer.
- Click Print
- When finished, allow the bed to cool, and then wipe clean with small amount of isopropyl alcohol on clean paper towel.
DO NOT LEAVE MACHINES UNATTENDED
Please do run 3d printers with being present in the Lab. If a printer fails it could result in cooked filament / extruders, damaged mechanical components, or fires.
Explore Further
Firmware and Configuration
- Wiki doesn't like weird file types so check out our Github
Machines at Hacklab
See individual printer pages for details and maintenance logs.
Physical Problems
- Print not sticking to bed
- Check bed levelness (Prusa's probe this automatically)
- Check print bed distance to print head (Live Z height adjust)
- Extruder no longer extruding filament
- Check filament feeder for ground plastic preventing extrusion
- Check gcode generator settings to ensure proper filament properties selected (diameter, density)
- Inspect hot-end for plugs by manual extrusion at temperature
- Check filament feeder spring pressure (WARNING: DO NOT ADJUST THIS UNLESS YOU KNOW WHAT YOU ARE DOING, THIS IS THE LAST STEP)
- Extrusion is discontinuous
- Check filament feeder for ground plastic preventing full continuous extrusion