Type A: Difference between revisions
Jump to navigation
Jump to search
(Add features, update status and log) |
|||
| Line 29: | Line 29: | ||
!Entry By | !Entry By | ||
|- | |- | ||
|February 18, 2017 | |||
|as per @Myles: OctoPi3 is working if you need to use a 3D printer. | |||
|MikeP | |||
|- | |||
|January 2017 | |January 2017 | ||
Revision as of 17:44, 18 February 2017

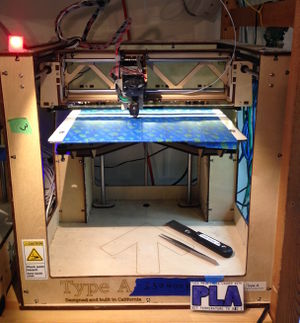
This page documents the Type A Series 1 (2013 plywood model).
Type A lives on the third shelf of the 3D printer tower, next to Ultimaker 2
Status
- Severely under-extruding, probably needs a good nozzle cleaning
- Loaded with white 1.75mm PLA
- PLA ONLY! (to prevent nozzle contamination)
- Cura 15 Settings here
- http://octopi3.hacklab.to/
Features
- Type A Series 1 (2013 plywood model).
- 254 x 230 x 230 mm print volume
- 1.75mm filament
- .35mm nozzle
- Temperatures readings are lower than Ultimakers (e.g.: 190 for PLA compared to 210 on Ultimaker)
- It is managed and accessible from the web GUI: http://octopi3.hacklab.to/
- Its manual is at http://bit.ly/1NDToMT
Machine Log
| Date | Notes | Entry By |
|---|---|---|
| February 18, 2017 | as per @Myles: OctoPi3 is working if you need to use a 3D printer. | MikeP |
| January 2017 | Attempted cleaning nozzle, printer still under-extruding | ran0 |
| January 28 2016 | The X (and to a lesser degree the Y) axis are skipping and it ends up offset. Tightened the belts. All good. | alaina |
| January 1 2016 | Print head not extruding. Mechanics and octopi commands seem to be working fine, but filament does not extrude from print head. Also, the Z axis is off a little, and home is slightly too close to the print head. Easily adjusted by hand. | emmy (saskeah) |
| January 2 2016 | On Igor's advice, I tried pushing through some filament (with the hot end at 185C), and it came through just fine. The pinch wheel needs to be cleaned before using, using the compressed air and little metal brushes by the soldering station. On my to do list (hopefully before end of Tuesday) is to clean out the print head using Igor's "cold push" method, clean the pinch wheel, adjust the Z axis, and re-tape the bed, then print a calibration object to make sure all is good. Also, if anyone else does all of this and wants to print - just a note that the 1.75 inch filament is *super* brittle, so be careful! | emmy (saskeah) |
| January 2 2016 | Cold push clean out of extruder head done, extruder doesn't seem to be blocked. Next step is to clean out the pinch wheel, which is on my to-do before Tuesday, unless someone else feels like taking that on. | emmy (saskeah) |
| January 3 2016 | Pinch wheel cleaned with compressed air. Bed re-taped and cleaned with isopropyl alcohol. Cold push clean of extruder head repeated for good measure (and during a sticky moment unicycledave took the head apart and removed some extra gunk). Z axis adjusted. Attempted a calibration object, z axis held bed too far from the print head. Attempted again with adjustment, print head was too close and scraped the tape. Good news: printer totally functional. Bad news: Z axis still needs tweaking, and part of the bed needs to be re-taped again. | emmy (saskeah) |
| January 4 2016 | Bed re-taped, z axis double-checked. Type A gets my stamp of approval - good to go! | emmy (saskeah) |
| January 10 2016 | Did a test print that came out perfectly calibrated, but with some relatively minor gaps in extrusion. | emmy (saskeah) |
| January 17 2016 | Tried another test print that came out with more pronounced gaps in extrusion. Tried a calibration cube at 220 C, and it came out well. Downloaded the new version of Cura and used the default presets to print another test cube. The presets are fairly different from the previous version, and the test print came out perfectly. | emmy (saskeah) |